Making N Gauge vehicles on the Cheap...
Making Economies Where I Can...So I can afford the crucial expensive stuff!
(...The story so far...)
Because I've chose to base my model railway on the KATO system of Unitrack, due to it's modularity and reliability, I literally paying the price for it's beginner friendliness - over, say, the cheaper PEKO system. In particular, the points (turn-outs), which are the heart of my plans are quite costly and I need a few, so economies need to be made where I can.
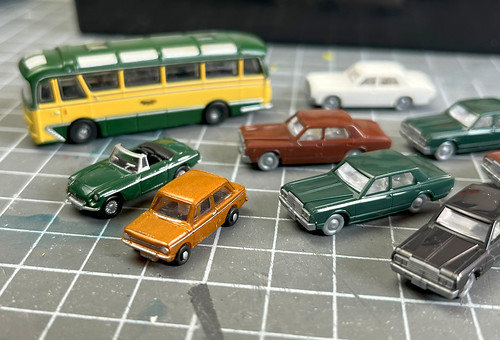 |
| Above: My collection of purchased N Gauge vehicles. And that's as many as I'm going to splash out on! Still, they give me reference for my models! |
With the purchase of the KATO Unitrack being top of my buying list I can't afford to buy 'the very best' of ever other item I need for my layout. Among all the ancillary items I need to consider are scenics like buildings and vehicles to populate my fictitious Japanese town.
Now, as I mentioned in a prior post, I'd already bought a couple of lovely examples of Oxford Model and Graham Farish vehicles, these are relatively costly when you consider that I'll need quite a few to make a believable town-scape. So I undertook to 3D print my own cheap stand in vehicles.
Trial and Error, My Way of Learning Things!
I'm not a very organised thinker, whenever I start a project that I've never done before I don't do comprehensive research followed by meticulous planning then careful construction. Instead I do a little research, followed by a little planning and then I just make things up as I go along.
I make a lot of mistakes, but I also have a lot of fun. That's just me.
My tiny 3D printed N Gauge vehicles have been like that, I'm sure experienced 3D Printers will say I've gone about this all the wrong way, but I've blundered my way to a result even if it could have been better.
So, one attempt after another ensued as I slowly changed how I did things and hopefully improved ever consecutive model as they rolled off my Flashforge Adveturer 3 printer...
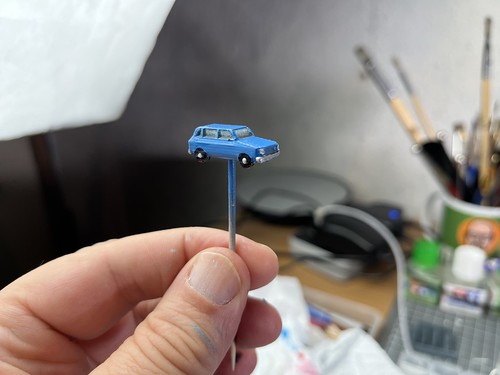 |
| Above: My first completed attempt... Not horrific! (?) |
The commercially produced N Gauge cars came in handy as I used them as reference templates on which I based the dimensions of my models and they also gave me something to aim at. Obviously, my vehicles would never be as good BUT if I hoped that nobody would notice as they were so small and would only be viewed from arms length distance! 😉
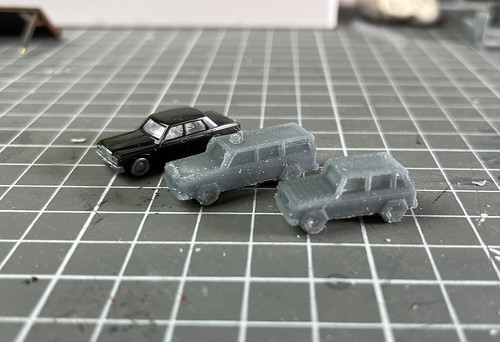 |
| Above: I compared my models against the commercial ones as I went along. |
Getting There, And I'm Actually Quite Happy!
After innumerable 'prototypes' I did end up with a little army of 'not quite perfect' variations! This progression got me to a model that I was quite pleased with, as I seemed to eventually get the hang of how simplified I could go in order to get reasonable detail.
 |
| Above: They don't look great close up, but I'm particularly pleased with my version of the classic Suzuki Carry van! |
Yes, the end produce does look like a kids idea of what a car would look like, but this simplicity does mean these tiny models print with reasonable success. And look 'OK-ish'! (I'm happy anyway.) 😄
However, I won't say they are perfect, my inexperience in the dark art of 3D 'slicing' means I haven't been able to rid my models of the dreaded layer lines. Where that is because I am not printing y models the right way or because my standard 0.4mm nozzle isn't good enough I can't say...
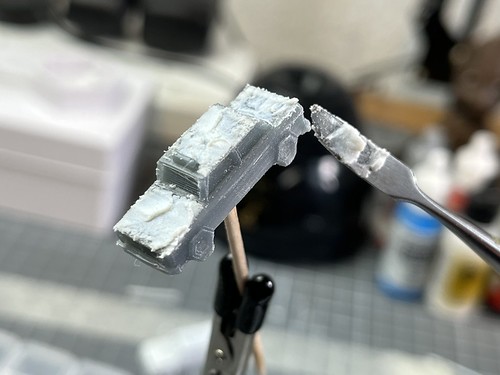 |
| Above: If you can't fix it, hide it! Slap on the filler and sand! |
So, I've had to resort to some old school filling and sanding to smooth out the imperfections. A bit of an annoying recourse - I'd much rather I had perfected my 3D printing, nut I suspect that I am at the very edge of what my printer is capable of - but the end result isn't too bad is it???
I got there in the end I think, it has been fun and I seem to have managed to produce a large amount of the vehicles that I might need for my layout in one go.... For pennies! 😁
The good thing is that now I have sorta worked out a 'successful' formula for making my vehicles, it's easy now to knock out variations.
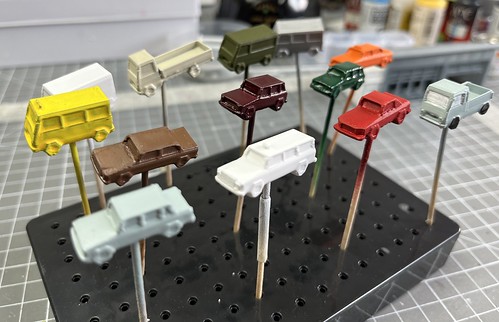
And with the printing sorted out to my satisfaction, I now turn to the actual painting...
And that's where I'll leave things for now, I'll do a 'reveal' video when things are completed.



Post a Comment