
It's 'Bye' Apple iPhone And 'Hello' Fuji XT-2 DSLR!
Phone Update Shenanigans
For the past few years I have gotten pretty lazy in my video creation, I'd just gotten so used to the convenience that an Apple iPhone provides with it's 'auto everything' features for video. The sheer ease of which the iPhone make filming video and taking photographs make you overlook the more advanced aspects of filming and photography and after a while you doubt you needed them and just accpt the limitation of a mobile phone...
Until last week that was... One Apple update and my iPhone workflow feel to pieces!
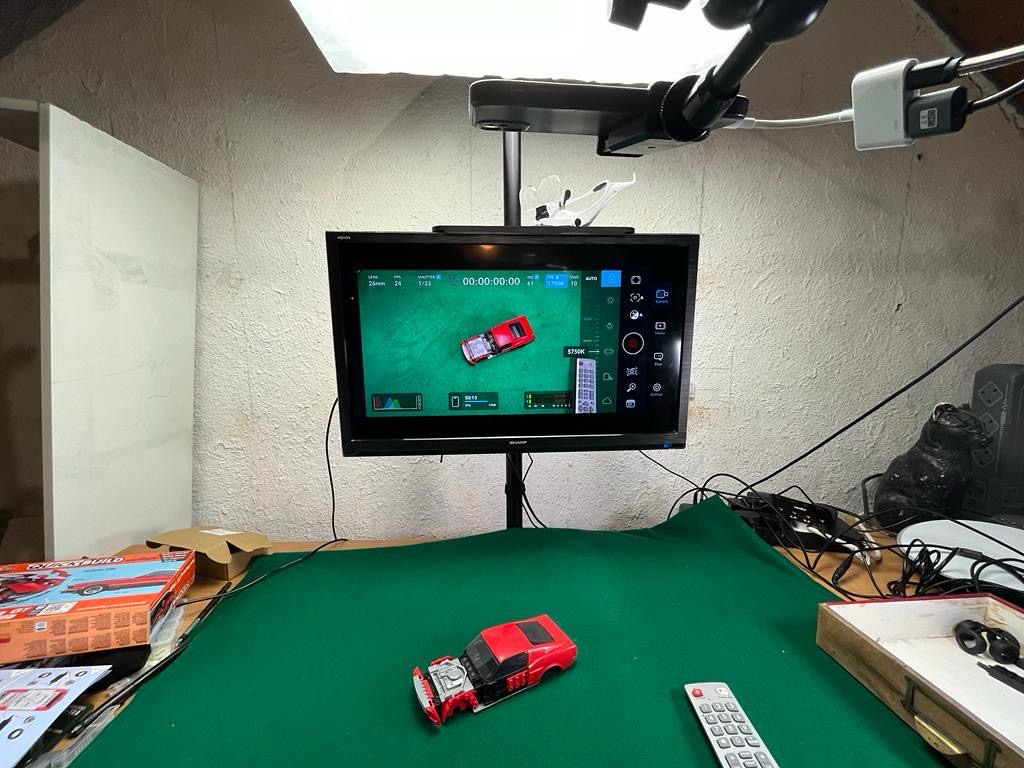
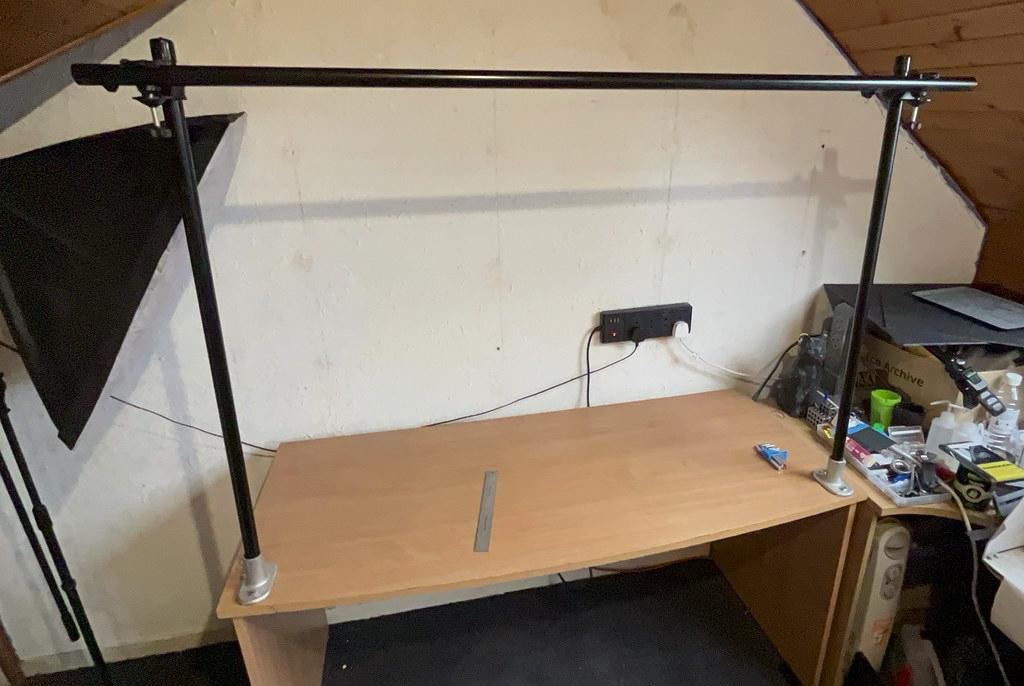 |
| Above: My home-made filming/lighting rig for overhead top-down video creation. Made out of lengths of 20mm aluminium tubes and great for attaching all sorts of camera and lighting accessories. Although, I have wound in use round poles aren’t absolutely ideal for attaching stuff as you then have to tighten any attachments *really* tight to avoid and heavy equipment from ‘dropping’. I note that the commercial versions of this idea use square tube and not round. |
All of a sudden, my iPhone no longer connected seamlessly with the smart TV I have set up in my attic mancave work area and could no longer monitor my top-down video footage live on the big screen.
I had to resort to a fudge using a small mirror so I could see the phone's backscreen for framing and any touch screen features that I wanted to use!!!
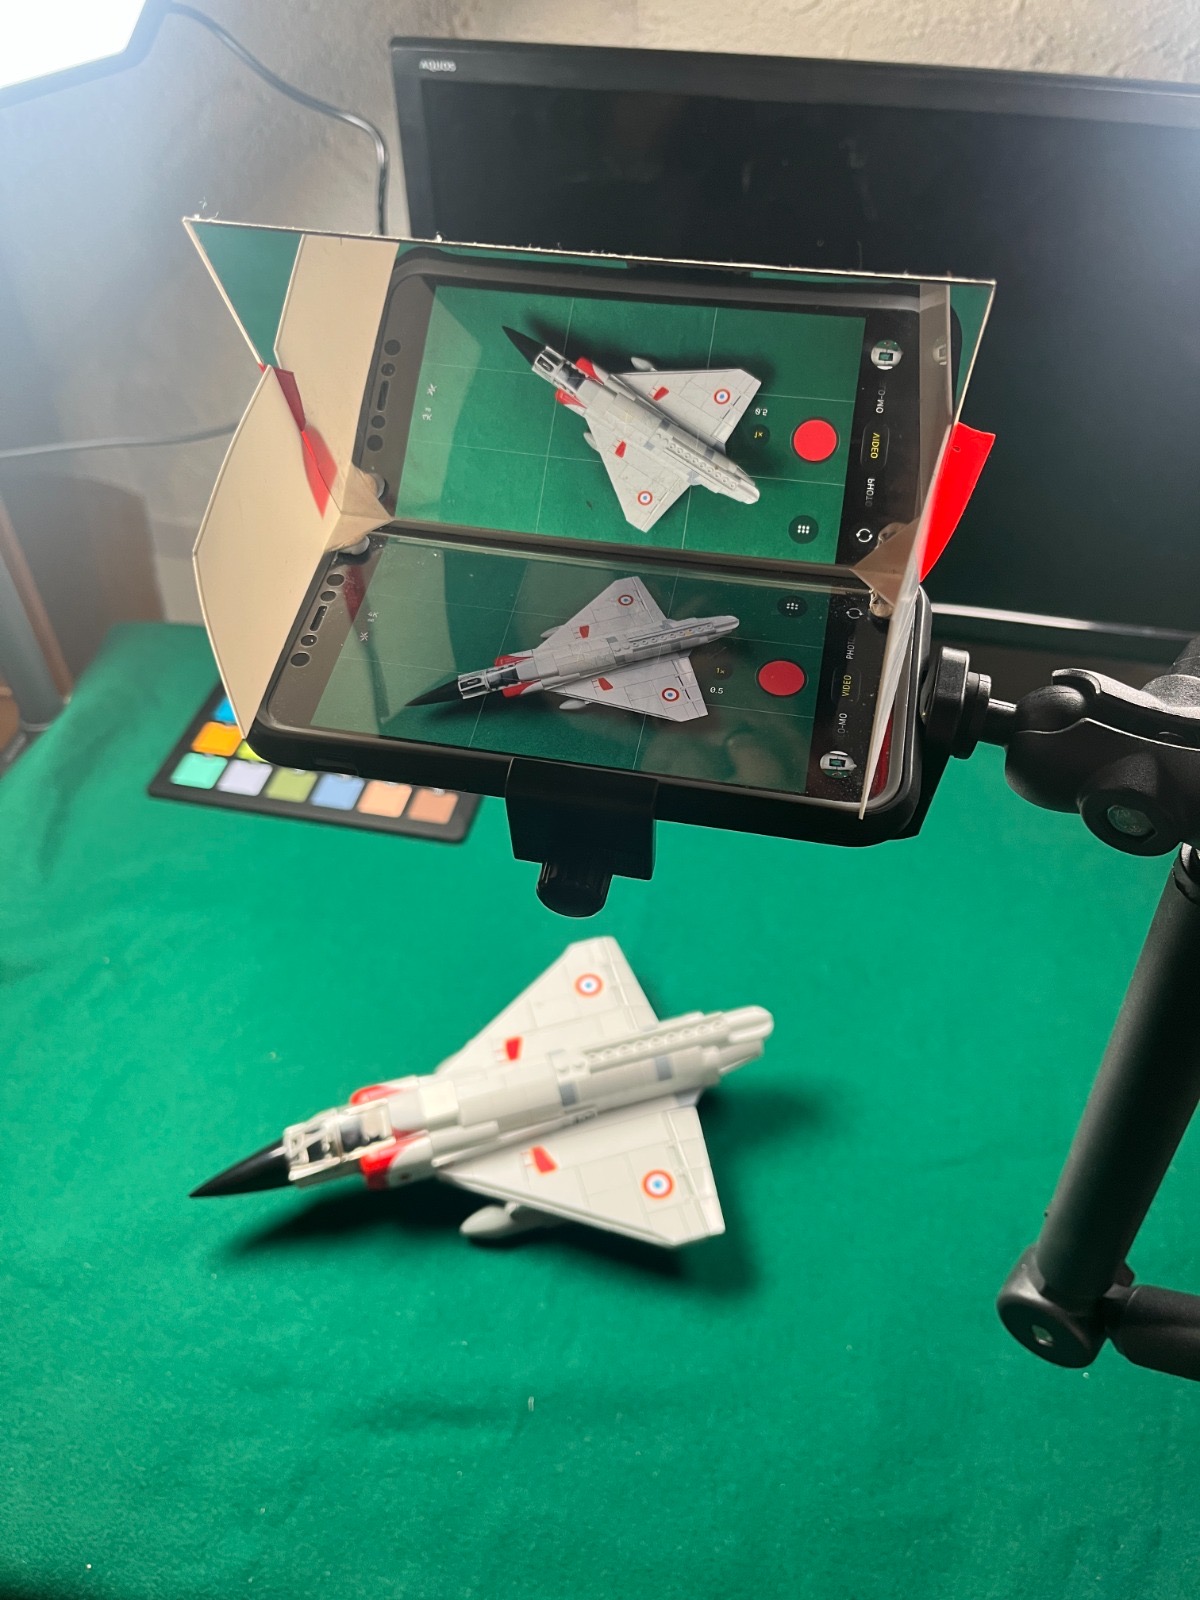 |
| Above: One Apple updates stopped me monitoring my iPhone screen using my smart TV I had to resort to rigging a mirror arrangement so I could view my camera screen from my seated position. Not great, but it kinda worked - it did remind me just how useful a screen monitor is though, so I am glad I have this ability back now that I have switched to my DSLR camera… No more mirror! |
This took me way back to the days before I bought my smart TV and I sudden;t remembered what a pain in the ass not having a filming monitor was. 😡
On top of this I had a bit of a disaster with my jury-rigged video over-head soft-box lamp, which came loose from it's ceiling mount and came crashing down on my work bench mid-filming. To be honest, I'm suprised it hung on as long as it did as it was only ever supposed to be a cheap 'make do' set-up until I could afford a better quality video key-light.
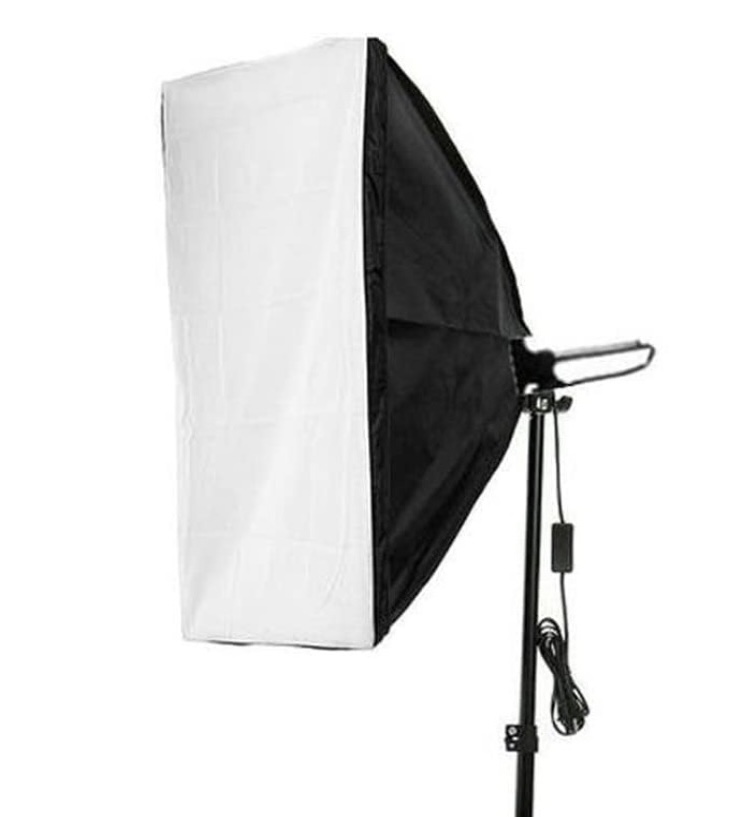 |
| Above: My old soft box lamp, only 20 quid when I first bought it many moons ago. But it’s done me proud, it’s main disadvantages being it non-dimmable bulb and the sheer weight and size of the ‘tent’ - which, in the end - led to it’s falling off it’s ceiling mounted and breaking! LED laps are the way forward and have been for some time! |
But, together both of these setbacks forced me to finally think seriously about updating my filming set-up (an break open what meagre savings I had put aside 'for a rainy day'...Well, it's pissing down I guess. 😐
Improvements & Upgrades
I did try to make a dodgy repair to my old softbox lamp, but the poor old girl wasn't having it as I think that - aside from breaking the frame and the mount - the drop had mdamaged the bulb (which in itself is a good £30 for a basic - not adjustable - replacement). In actual fact, the inability to fine tune the lighting output (or colour tempreture) had been niggling me for quite some time.
So down she came again, this time for good. RIP. 😟
After a bit of reserach I decided that the NEWER GL1 PRO flat panel key light system was what I needed, and in fact for the best set-up I would need TWO... Unfortunately, just one of these lamps wiped out my savings in one go (I'm not a good saver)... BUT, I was advised that you could get away with just one to begin with if I put up with the obvious imbalance in lighting (which I might be able to compensate for - to some extend - by using a small secondary 'fill' lamp I have until I can save again for a second GL1 Pro)... The folloing pic shows the light imballance using this temporary set up --->
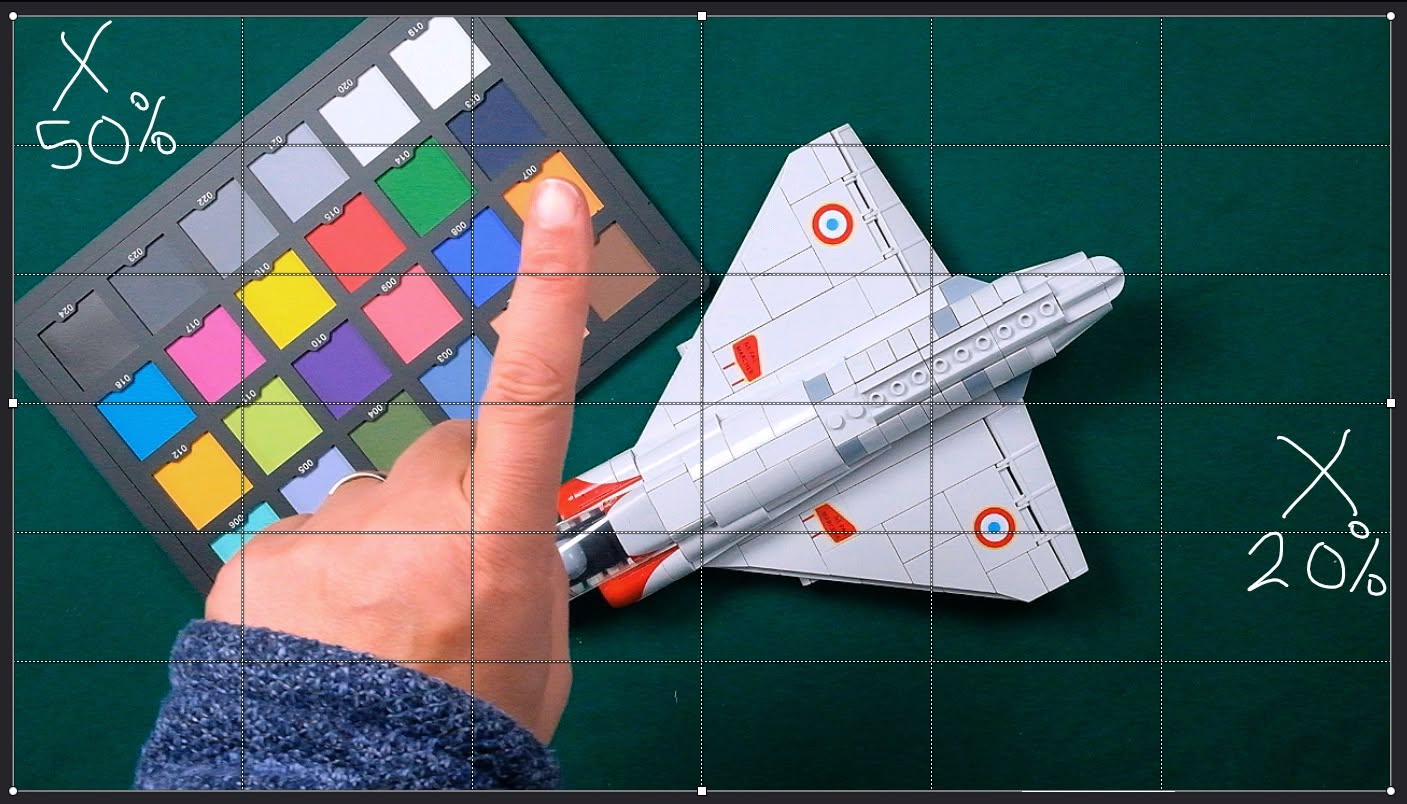 |
| Above: Light/exposure/colour test on my temporary set-up. The new Newer GL1 Pro light (45w) mounted on the left, my old RALENO 13" LED Video Light, 19.5W Panel from the right. So you can see the imbalance, but it’s usable (just). |
OK, that's the lights, what else do I need?
Well, the other thing the Apple iPhone does - naturally, being a phone - well is audio. The iPhone microphone and audo levelling sound settings meant I never had to set up a microphone and recording system. Back in the 'old days' when I shot video I used to have a seperate audio setup, a audio recirder and either a shotgun or lavalier microphone. It was a lot of extra work which the iPhone took off my hands and just sorted out itself.
Once again, there were issues, it wasn't perfect, if I turning my head away from the iPhone which commentating there was a obvious reduction in sound quality. So, I knew what I needed was a better quality sound recording system and now was my chance...
Uisning my Fuji XT-2 camera it was recommended that something like the wireless DJI Mic Mini. At just £45 for a single lavalier transmitter (all I needed for my one'man videos) this seemed a good option. And better still, it was available on Amazon's installments so I wouldn't have to wait. Bonus!
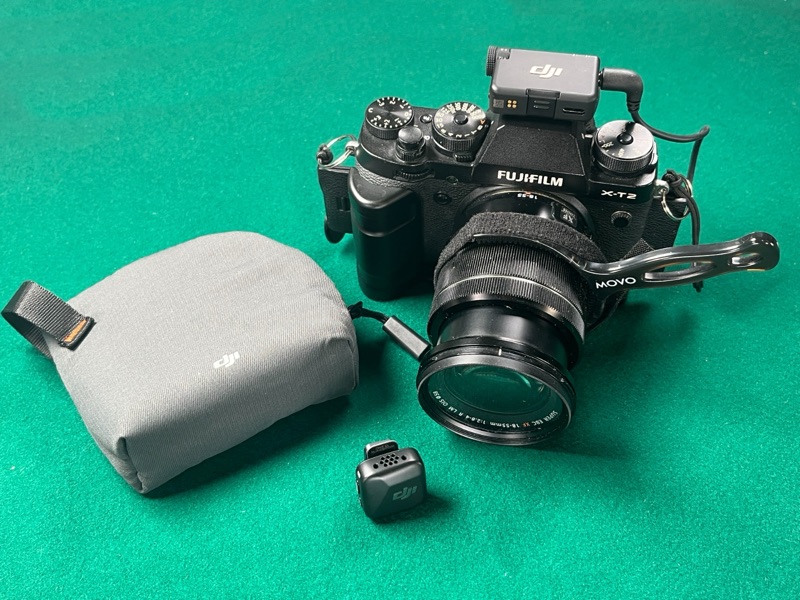 |
| Above: My iPhone’s built-in microphone was rather good BUT it was critically *directional*. Turn your head away from the phone while commentating and you would loose audio clarity. So when I changed back to my DSLR I knew I would add a specialist mic accessory and I went for the DJI MIC MINI. This is a small square transmitter mic (front) and a receiver (attached to the camera hot shoe). Being wireless meant that there was no cord to get tangled and the lapel mic always caught my narration clearly. I have tested this and the audio is excellent. |
This was great as - as I pointed out - when making my workbench videos I tend to be looking here, there and everywhere so having a wireless lapel mic would ensure that there was no 'in and out' during my commentary.
Lights, Camera... Mounting Rig!
Luckily, one thing I didn't have to by was a mini desktop lighting truss rig, an inverted 'U' shaped tubular frame I put together myself out of 20mm aluminium poled to support all my filming equipment. It works but it isn't a fexible system as - for stability - I had to fix it permanently to the desk. More modular and adjustable commerical set-ups - like the NEEWER Overhead Camera Mount Rig - are the other side of a hundred pounds, so for the moment I can live with the small inconveniences that my DIY rig poses (mainly adjustability).
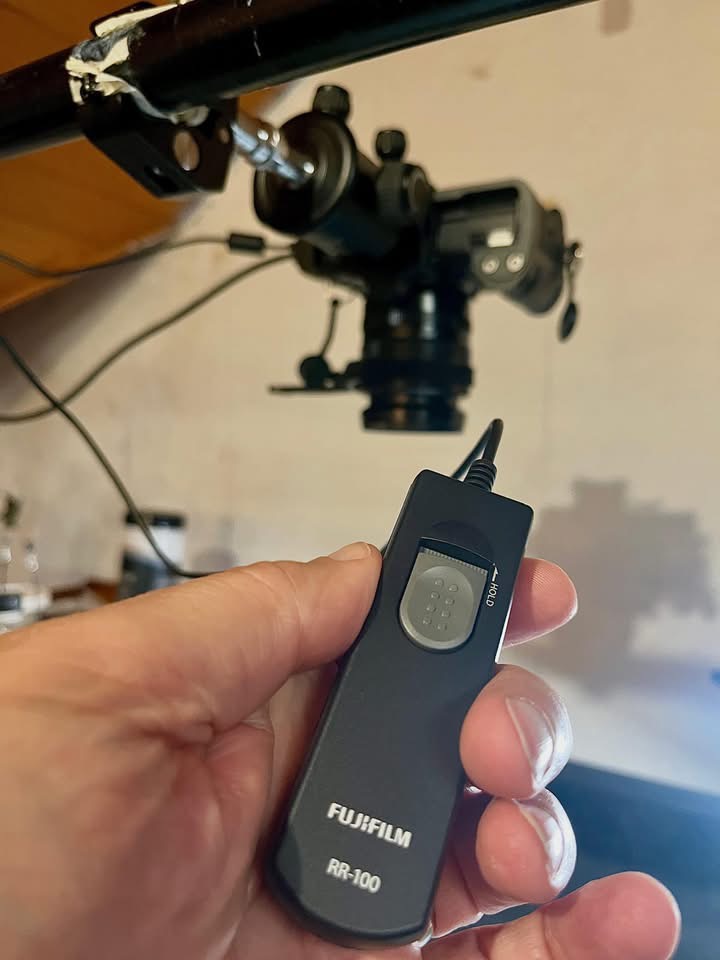 |
| Above: Unlike my iPhone set-up I now have to mount my zoom lens DSLR higher up on the mounting rig to get the most beifit out of that zoom option. But this then makes using the camera controls awkward from my seated position at my workbench - so I bought a Fujifilm RR-199 remote shutter control so that I can shoot stills or start video recording without getting up or stretching. I still have to get up to set camera controls before I begin my filming session but that’s no biggy. Unfortunately, the XT-2 control app is another one that seems to have suffered from iPhone updates and no longer works. :( |
Another fortunate happenstance was that my Fuji camera came with a Fujinon XF 18-55mm f/2.8-4 R LM OIS, and my research online told me that this lens just happens to be the ideal one for doing top-down video. Again, I had made do without a really flexible optical zoom while using my iPhone, but there were times when demonstrating certain techniques or showing small details on models that a really good zoom would have been really useful. I just did without which mean a lot of my model making videos were kinds locked in to one mi'd-distance framing so that sometimes - so you could see everything - onbjects were a little on the small size.
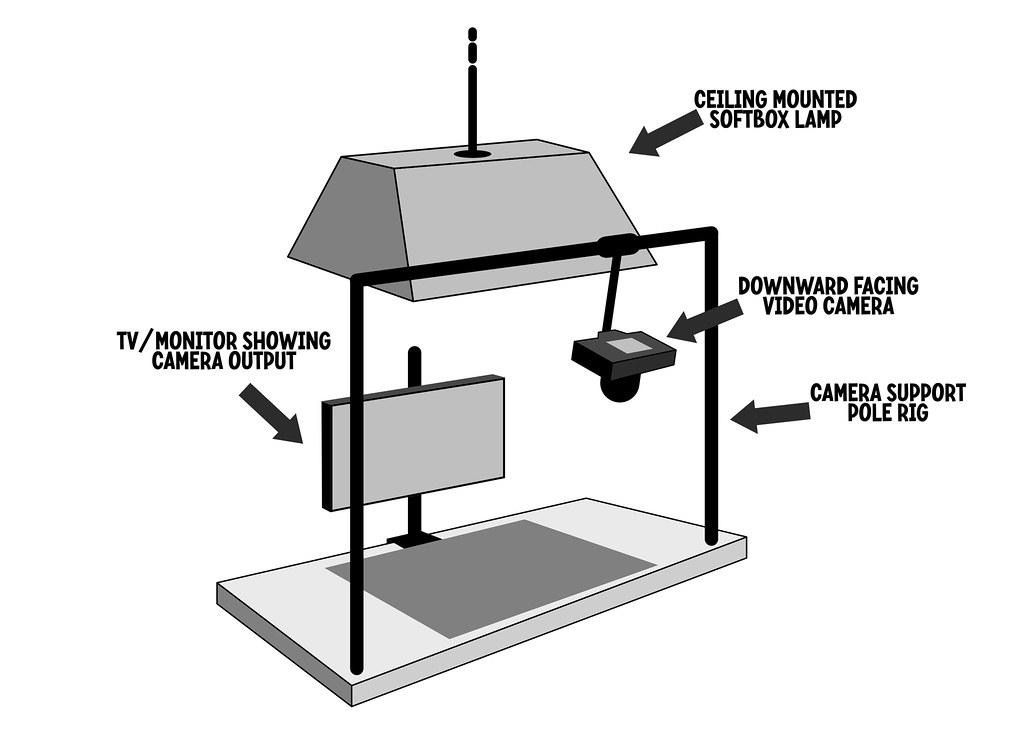 |
| Above: My original sketch for my top-down video set-up. Initially - and ironically - I had it in mind to make use of my Fuji camera right from the start. But this changed when it became apparent just how convenient it was to use an iPhone instead. Only now and I reverting to using my Fuji DSLR again. |
And that's about it really... At this point I can just about afford a 'half a setup' which I will have to cope with until I buy the rest of teh kit I need.
This will, unfortunately, mean a small drop in the quality of my desktop filming while I make do with underpowered lighting and my having to relearn a lot of manual camera settings. It's will be a while befor my video quality get's back on a par with the iPhones auto setup, but hopefulling - in time - I will eventually have the ability to surpass the iPhone in filming workflow.... Hopefully!!! 😉
—————-
Postscript: Hints on setting up a camera for over-head filming:-
Of course, the gadgets and accessories for making overhead videos is just one part of the workflow, the other part is teh technicalities and actual setting to make filming work. I have built up a sort of ‘rough guide’ or mini-manual in the form of several pages of notes about how I chose and set-up my lighting and camera and I will link to them here if anyone is doing this sort of rig. Hopefully they might be helpful…
Post a Comment