

After another health related hiatus I'm back in the saddle and dusted off the 3D printer. Time to clear the backlog of incomplete models...
And off we go again!
Getting started again after an absence is a bit of a pain. I don't remember just how many times I've had to restart my blog after a break caused by one thing or another but here we are again.
The current stuttering start was cause by the health issues caused by last September's stroke. Luckily I had what some term as a 'mild' stroke, I was very lucky but I have undergone rehabilitation over the past months and am at the point where I can get out and do things again. And restarting my hobbies was one of my goals so it's nice to get to this point.
Taking Up Where I Left Off...
Before I start any new projects (and I have a long list of ideas) I want to finish off some projects I doing when I had my stroke. These have been languishing on a shelf gathering dust and so I thought it would be an easy way to get back into modelling, rather than getting too ambitious by starting a completely new project from scratch.
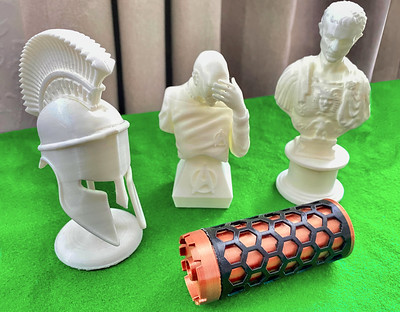 |
| Above: The selection of newly completed projects. plus one new one. I couldn't resist my first project combining different filaments. |
I had a couple of statues and a miniature Greek helmet model to clean up with some sanding and filling. All small jobs but were a bit time consuming as sanding PLA can be a bit tricky as it has a tendency to fray rather than sand (unlike hard commercial kit plastic), so care is needed.
Additionally, I decided to have my first go at combining PLA filament types and bought my very first example of a metallic effect PLA. I spotted a lovely looking copper filament on Amazon and decided I needed to try this out and I found a model (STL file) on Thingverse for a gun suppressor!
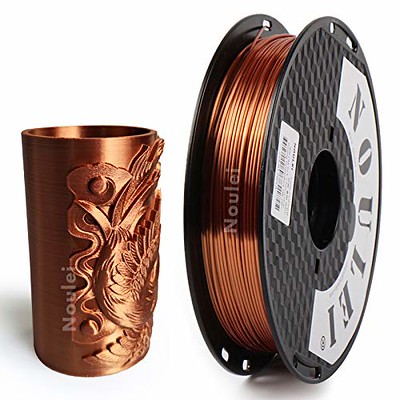 |
| Above: Noulei Silk Copper Metallic PLA 3D Printer Filament. |
I should explain that while I no longer participate in airsoft - in fact, I have sold most of my kit - I have retained a couple of my favourite gun for display purposes and want to print out a few accessories to accompany them.
I haven't 3D printed any models where I have simply left them in their raw filament colour, so this was a nice experiment especially as I combined two different PLA colours - black and copper.
The Old And The New...
So , in order to get myself back on course, I felt I had to complete these unfinished projects before I could undertake anything new. It was like resetting my creativity. Luckily, these models were - relatively speaking - quite simple projects which I just had to print, clean up and paint. But, despite this, I do get a lot of pleasure from the finishing process involved with these type of statues. They were the ideal reintroduction to modelling for me...
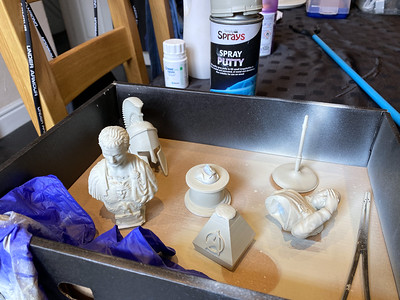 |
| Above: After sanding and finishing the prints the next stage in my process was to spray them with a grey filler/primer. |
Having completed the bit of cleaning up of jagged edges and imperfections caused by the printing - with some sanding and trimming and a little bit of filling of gaps - I moved onto a favoured technique that has become a pretty standard part of 'my' process. I use a spray putty medium to create a base layer onto which I would apply my final paint coats. The grey filler/primer spray is thicker than normal primer paint, almost 'goopy' in consistency and so helps smooth out any unwanted irregularities (like layer lines, for example).
You have to be a little careful with the use of spray putty as by it's very nature is can easily obliterate delicate detail in your model if you over-use it. A couple of light coats is usually enough as you have to bear in mind how much more thicker you subsequent painting layers will make the overall coating of your model.
 |
| Above: Having applied the filler primer you can still make out the 3D print layer lines but these should disappear after the addition of the final coats during the painting phase. |
At this point the finishing paint techniques for the various models differ. The Picard bust and the Greek helmet models will be the recipients of slightly more realistic finishing effects while the Julius Caesar bust will be a monochrome figurine in a beige/stone top coat.
Like my previous classic statuettes I will be using Rust-Oleum Painter's Touch Almond spray paint as it gives the model a nice antique figurine colour. The plinth model I made to display the bust will be finished in a Painter's Touch spray in mahogany.
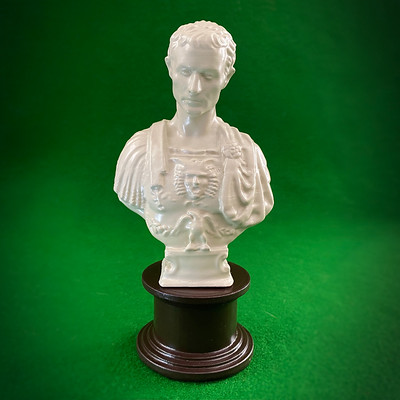 |
| Above: The finished Julius Caesar. |
Post a Comment