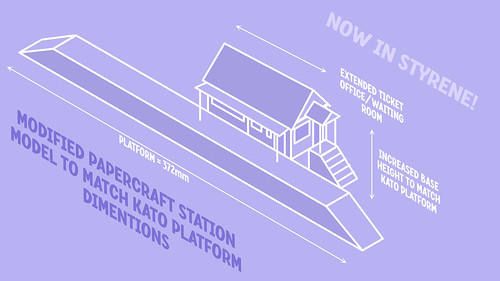
They say that the 'third time is the charm', well we shall see...
Not long after my stoke I started planning - perhaps a little too optimistically - to get back into model making with my 'BRITISH TANKS FROM D-DAY TO BERLIN' project. Well, it turned out to be too soon and too ambitious of a project for me to handle (literally) at that point as I soon discovered my ability to manipulate small parts and my coordination were still precluded such hobbies.
Fast forward on over a year - plus a reality check and long regime of physio exercise - I feel more confident in being able to restart my modelling ambitions, albeit with slightly more modest and attainable goals.
Enter model railways and building a small layout, a hobby that is something of a cliche for a guy of my age looking for a relaxing pastime, but is probably the kind of laid back relaxation that I need.
Starting Again From Scratch
The thing about model railway building is that - put simply - it's a kind of 'build as little or as much as you can' hobby. Making a layout can actually be done without having to do a single bit of model making if that's what you wany, everything you need can be bought right off the shelf with a huge range of scale models and accessories pre-made and even painted!
This gives me scope for a flexible re-entry into a model making project as I can cherry pick how deeply I take the modelling - from simply adding some extra realism to pre-made scenery, to making pre-painted 'kit's al the way up to full scale 'scratch building' of models.
But so far my early attempts to 'see what I can do' have been very disappointing. My first attempt with a papercraft model ended ignominiously, and my second attempt using foam board was only marginally better.
 |
| Above: Failed model making attempt No.1 - Papercraft. |
So, like the Tree Little Pigs in the story I am moving on to something which I hope will suit my needs a little better... in my case, the next candidate for a suitable model making material will be Styrene Plastic.
Why Styrene aka 'Plastikard'?
Having experimented with different types of what you might call 'soft' materials - paper, card and board - I decided that they just didn't suit my slightly ham-fisted abilities. Whereas - at one time - I could have a delicate touch when crafting with materials my slight disability and lack of complete control with my hands meant that I tended to fumble a lot, leading to some very frustrating moments and crafting 'rage quits'!
I had many example of gluing things to myself and tearing or bending things because of moments of failures in my dexterity, and while this can sound a bit amusing - having parts sticking to me rather than other parts - I can't emphasise how upsetting these small accidents can be when at one time you could do this sort of thing easily.
I know completely understand the upset and frustrations that my father had after he had his stroke and attempted to carry on his beloved hobbies, even though his stroke was far more severe than mine.
 |
| Above: Failed model making experiment No.2 - Foam Board. |
So, what I needed was a more robust modelling material, something that could compensate somewhat for my awkward man-handling. And this brought me to High Impact Polystyrene Sheet, more commonly called styrene or Plastikard.
The one downside of opting for styrene is the expense. I wanted to go the 'soft' material route mainly because of my very tight budget - card being freely available - but it looks like this is a compromise I will have to endure in order to be able to craft models. 😑
Working With Styrene...
One of the reasons I like styrene is if intrinsic rigidity compared to carboard of comparable thickness. A 200gms weight of stock card - which is what I used for my test papercraft station model - equates to styrene sheet of about xxxxmm, yet while of the same thickness the styrene sheet is far more durable in handling, doesn't tear or warp and - importantly - is not susceptible to moisture damage.
While cutting and building with styrene is roughly similar to working with card stock it has it's own peculiar characteristic which are illustrated in this excellent introduction to working with it...
Using The Proper Tools...
Extra expense was something that I would have rather avoided, but I was so despondent after my first two model building failures that I decided to bite the bullet and 'do this properly' this time!
Therefore, I purchase some tools that would help me in my styrene building project...
The BIG Model Making Advantage
Now it would be nice to hype up styrene over board because of the selection of 'off the shelf' simulated textures and material types available that make your model making life all that easier...BUT...
The truth is that paper based materials do have one big trick that styrene doesn't - that can be printed onto, which means there is a huge assortment of brick, stone, wood and a host of other materials that can be used when 'soft' building.
However, styrene can be moulded into specific building shapes and patterns can be embossed onto sheets. So, you can have useful scale building archetypes like I-beams, L-beams and tubes to play with and also textures sheets simulating roofing, flooring or wall materials. And, again, these are pretty ridges components which can be cut precisely to suit your model without fear of tearing or warping!
Styrene sheets are also made is a large variety of precision thicknesses and sizes (and shapes) which means you kinda have access to a semi-modular 'building kit'. All you have to do is the cutting out and shaping and gluing together... Though, I'm probably making that sound easier than it is!
A Test Project - The Proof Is In The Pudding
So, having chosen my preferred medium for my THIRD attempt at building my N Gauge station AND bought the appropriate tools for the job, I now have to knock up a new design for my station and then I can crack on with my first build!
And let's hope I have finally cracked the curse of model making this time! 😏 We shall see in Part 2!


Post a Comment