

Rebuilding a Matchbox truck was a bit harder than I thought!
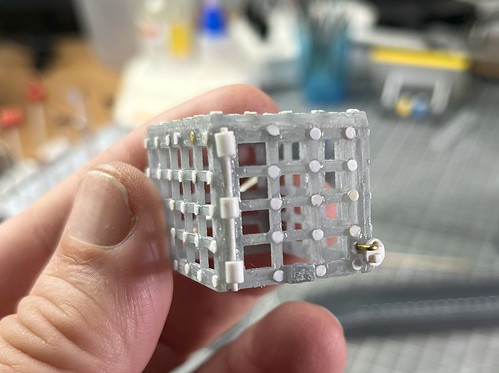
Cagey Start!
I left off my build of my first Gaslands vehicle by 3D printing the basic cage parts and then putting them together into a box shape. Having done this I wanted to decorate the lattice box with rivets so that it have that Old Western style jail look. This would done by gluing on lots and lots of 1mm diameter plastic discs...

Phew! This took a while and I stuck a lot of these tiny discs to my fingers! But I got it done.
I finished up the jail cage with hefty hinges for the rear door and by carving a tiny padlock out of a piece of scrap plasticard. It was a bit over-scale but looked nice and cartoony (which I kinda like)...

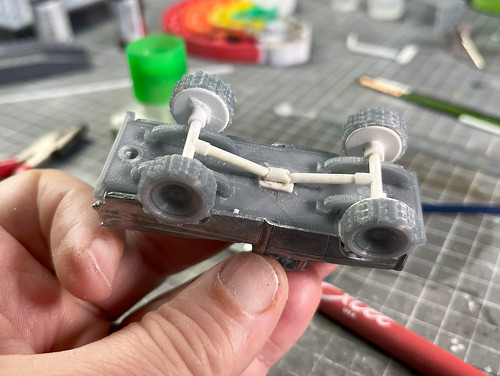
Don't Keep Us In Suspense!
Having completed the cage I turned my attention back to the shoddy job I had made of my monster truck's raised suspension. I still wasn't happy with simplified axel system I had hastily put together and decided to have a go at dressing it up a bit.
I still didn't want to go over the top with additional detail that would - after all - hardly be visible as it was mostly hidden beneath the truck. BUT, I wanted to put my mind at rest by having a go at a passing attempt at a vaguely recognisable drive train. Just for my peace of mind. 😄
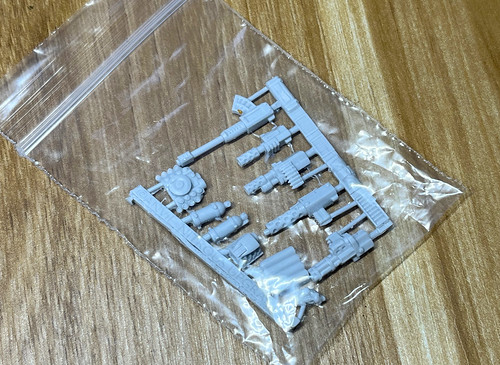
Mighty Muscle...Tricky Work!
I wanted to give my monster truck a bit of grunt! Foreseeing this I had already bought a set of commercial resin Gaslands accessory parts earlier in the month and so it was just a case of me picking which engine head I liked the best...
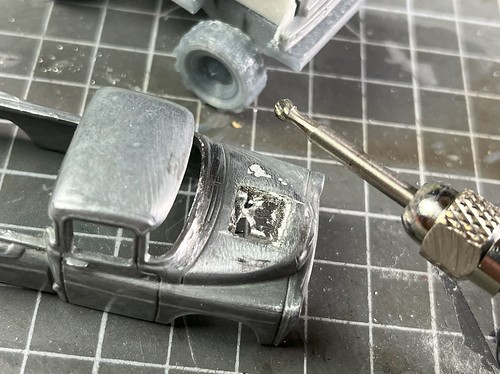
I had supposed that attaching my chosen part was going to be a simple job, but uh-uhh, nope. I haven't worked with diecast metal before and cutting a suitably sized hole in the vehicles bonnet proved to be a wee bit tricky as I wasn't sure what the best tool to use was!
In the end, I resorted to brut force with a a mini burring head on my more powerful BIG Dremmel tool (and even then it was a bit of a grind - excuse the pun - to chew my way through the metal bonnet)...
A Lot of Bull!
Last job for this session was the fitting of a beefy bull bar on the front of my trucks chassis. I didn't want anything too aggressive on the front - like a load of spikes or a bulldozer spade - as this is supposed to be a capture vehicle, so a simple bull bar seemed the better option.
I scribbled up a very simple design and also decided that I wanted to incorporate some wire mesh to help protect the lights and radiator... But, what to use for the mesh??? 🤔
The wife won't miss this sieve, surely?

(Incidentally, I discovered that the wire mesh on these kitchen sieves is easy to cut using ordinary kitchen scissors! 😉)

And that's that for now! In my next session I will start preparing all the parts for priming prior to painting. SO the big question will be just how rusty will I make my bad lands truck??? 😆
Post a Comment