

Finally Getting a Part of My Attic Space Organised!
Trapped in a Chaotic Limbo!
This has been going on far too long! My attic man-cave has been the house's junk yard for storage and that means - try as I might to clear some space - that the place just continually fills up with all our unwanted crap! It's a never-ending cycle of my clearing out stuff only to have more stuff placed back up there so I am constantly treading water!
Well, I'd finally had enough...
I recently snapped and began a ruthless shedding of a lot of teh crap that had just been gathering dust. You know a lot of that sort of stuff that we guys hang onto 'just in case it's useful', but then it never is!
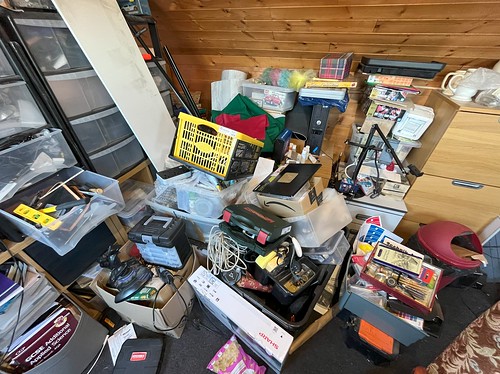 |
| Above: This is AFTER a big clear-out, and I still have loads of junk! |
Systematic Space Clearing
So, I came up with a plan. I started by clearing enough of the central floor space that I had easy access right to the back of the attic, then I began to organise one workstation space at a time.
My attic is made up of multiple deck 'workstations' and accompanying storage cupboards, each - at this point - overflowing with piled up junk (so, hence, unusable) - sections like my modelling bench, computer desk, 3D modelling bench and so on...
Starting from right at the back wall, I began to clear up, repair and reorganise one space at a time, beginning with my modelling come videoing desk area. I stripped back all the accumulated rubbish...
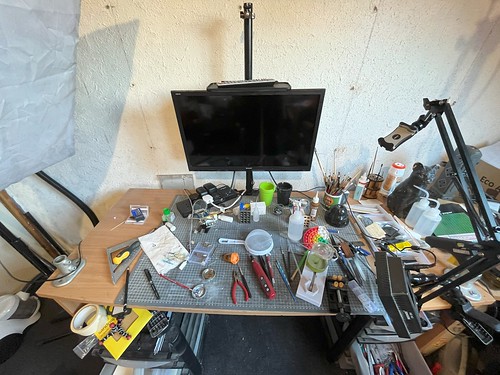 |
| Above: One of the lesser cluttered worktops, believe it or not! |
Once I had gotten rid or stored the plethora of modelling bits and pieces I managed to strip everything back to the bare desk. Like everything else, this desk was an old mismatching second hand item which - it turns out - was nearly collapsing due to rickety and broken joints. So that had to be fixed first...
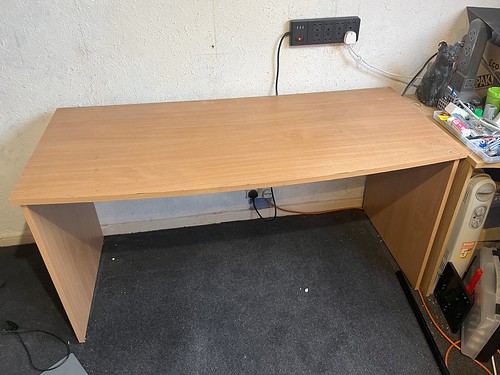 |
| Above: Tah-dah! There was a desk under there! |
Making a Top-Down Videoing Workbench
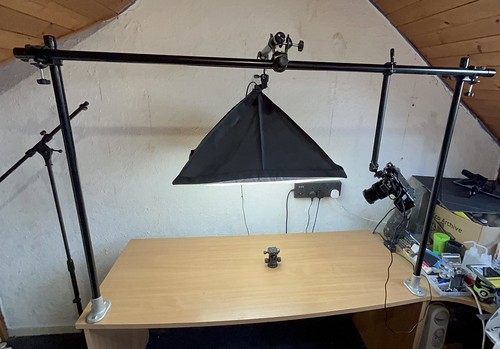
Having cleared the decks, I could now move on to rebuilding the workbench into a combined model making area with a video/streaming setup attached. The first job was to attach and over-head videoing 'truss' (I'm told this is the correct terminology).
In effect, this turns my workbench into a sort of stage or mini-studio with my truss being a rig onto which I can hang lighting and other video and sound equipment...

This sort of top-down truss is available commercially, but is quite expensive for what it is. So I decided to make my own version using 27mm aluminium wardrobe poles secured to my desk using scaffolding pole attachments for rigidity.
While I could have just used scaffolding poles - as they are very modular and idea for this sort of thing - I thought that these steel poles were too heavy and a bit over-kill hence using the aluminium poles instead. The scaffolding base points were worth adding, however, as they provide a very firm foundation. Important, as I wanted to hang some heavy items off my truss bars.
Video & Lighting Experimentation
The basic truss in place - and at this point I just guesstimated it's position, this might move later - I then started to try out attaching items to the cross-bar to get an idea where best to set-up my filing points and how best to light the work area.
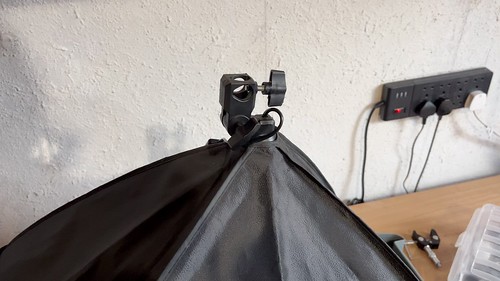
I started with my main lighting - a large LED soft box and my main Fujifilm XT2 camera - just to get a idea of the best positioning...
It turned out that the deep soft box hung too low attached to the truss and the camera was still a little too close, so some modifications would have to be made.
The first job, would be to move the soft box off the truss - handy as it kinda obstructed the addition of other accessories onto the top bar - and I decided that some sort of ceiling mount would have to be made to get it at the optimum height.
I did a quick doodle of what I wanted for an attachment post, based on some left over 27mm pole...

The attachment points - however - would have to be custom made to fit the pole and for this I designed and printed some 3D parts...
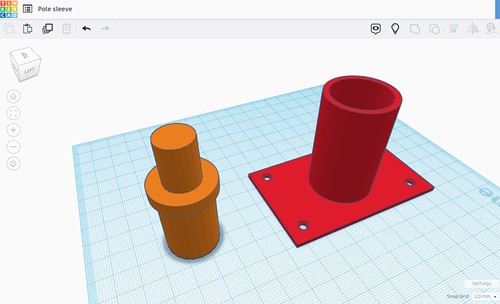
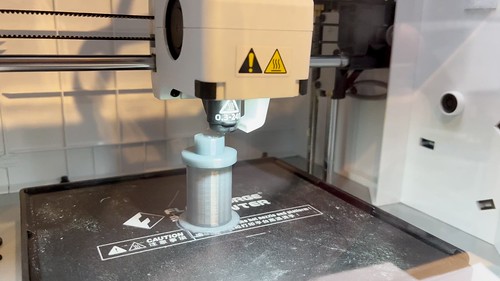
I was quite pleased with the results as they actually fitted and were fairly sturdy in the PVA plastic. I was a little worried about whether my make-shift pole would be able to bear the wight of the soft box...
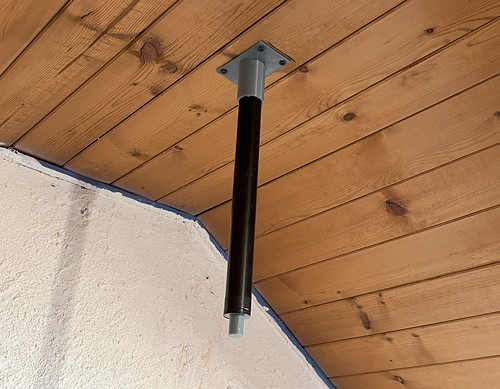
But, it all worked fine! (Surprisingly for me!)
And Job Done (-ish)!
Well, that all went without any disasters - I did have a concern about our dodgy ceiling falling in or some such thing. Seriously, the old wood panelling is only hanging on by the skin of it's teeth (it all will need to be replaced eventually and the walls and ceiling plastered instead).
But this is a great start. There will be a LOT of trial and error regarding the arrangement of video equipment on the truss, but that will all be sorted out in time. The good news is that it's a starting point and I can also begin working on projects again now!
Incidentally, the addition of a TV/monitor is to allow me to monitor the output from my cameras and also so I can watch TV and YouTube videos while I work.
It will be interesting to see how the makeup of this rig develops after real use. But in the meantime, I will now focus onto the next area of my man-cave that needs cleaning up - my spray painting bench.
Post a Comment