
Clean Slate and Some New Projects for March
“Hello, Good Bye” I’m late, I’m late, I’m late!

Where does the time go? It seems like it was just a couple of days ago that it was Christmas, and yet here we are now in March!
I thought time was supposed to slow down when you retire! But the opposite seem true, I've so many things to do but still struggle to get projects finished quick enough. At this rate, I'll still be working on this Christmas's presents of models next Christmas. 😐 Anyway...
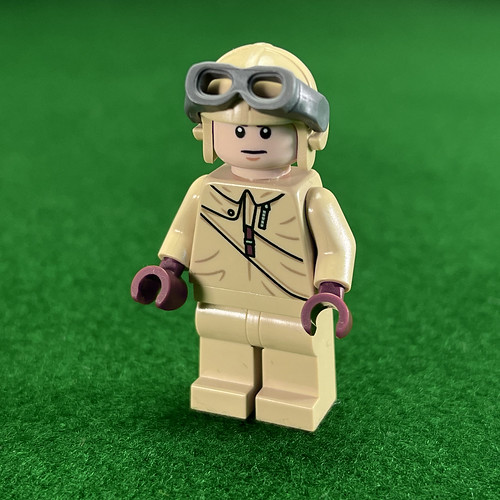
1. LEGO Plane - Indian Jones and the Last Crusade Diorama Set
I got the first half of this Christmas present - Indi's little car and the Indie and Prof. Jones figures - completely in January, but February was given over to model railway projects and getting my workbench sorted out.
But I've gotten the second half of this project started and it's looking good for me finishing this set within the next week or so. This part of the set is the little German fighter aircraft from the movie, and it's a complicated little model which will tax me as a 'newbie' LEGO builder!
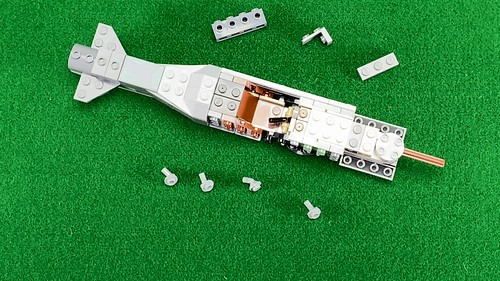
I'm going to try and avoid the long-winded, commentary heavy, filming approach I took with the 'Part 1' video I made on the car build and try and make a snappier (excuse the pun) video of this second part. I've watched a few other LEGO video builds done by others and they use a kind of 'time-lapse' approach, just showing the brick connections in quick succession. It's worth a try.
Incidentally, as a bit of a war plane nut there was some question in my mind about just what aircraft the film makers used in the 1989 Indie film that inspired this LEGO set. I did not recognise it as any authentic 1930s German type, and it turns out I was right. They actually used a slightly later Swiss design - the Pilatus P-2 trainer - as a representation of a Nazi fighter.

This fits in with the fantasy comic book-like atmosphere of the Indie movies. Perhaps the makers did not want to get bogged down with the the inclusion of too many historically accurate things, thus breaking the high-adventure - almost Tin-Tin - feel of the movie?

2. Shunter Mk. 2 - N Gauge 3D Print Project
I wasn't altogether pleased with my 'Mk.1' shunter model attempt. I suppose I can chalk this down to it being just my first go at 3D printing a loco body for N Gauge scale and so there were bound to be some issues. And issues there were...
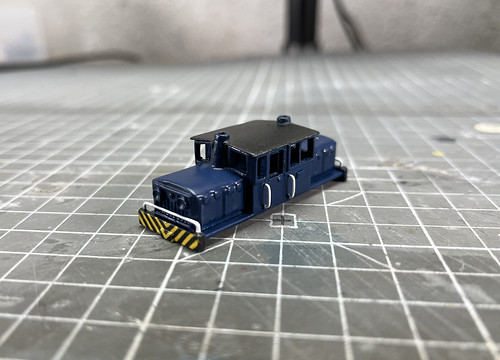 |
| Above: My 'Mk.1' attempt at a loco body design. Meh. |
Quite aside from my having to modify my idea for the design I really wanted to more easily accommodate the shape of the KATO power chassis I had bought - which meant that I ended up just recreating an already available commercially design - I also mis-calculated and made my design in slightly the wrong scale. I made mine in British 1/148 scale, instead of the continental 1/150 scale.
Not a huge difference, but annoying and *I* know it's wrong. 😡
And so, I am moving on to my next attempt. This will include the following modifications:
- Scaled correctly to Japanese compatible 1/150 scale.
- I will attempt to model a rear-cabbed shunter layout.
- I will experiment with transparent PLA filament
Possibly a lot of new things going on at once, but it's only a small model so I may be able to get away with this. First of all, lets look at the new design layout...

I managed to work out a way to work round the centrally situated motor of the chassis in order to get a rear cab loco by adding a extrusion in the middle (that small rectangular box that juts out of the engine enclosure in the above picture). It's a bit of a fudge, but it's all I can do to make this design work with the KATO chassis. Ah, well.
I also re-structured (shrunk) the design so it comes closer to 1/150 scale.
Finally, the big gamble, I tried printing the design out using 'transparent' PLA filament. The idea is that with the whole model printed in transparent plastic I shouldn't have to add window (which are a bit of a pain) and just paint over the body masking out what I want to be windows... In theory! It's an experiment.
Well, the good news is printing the transparent PLA actually worked - although I had to have a few goes to get the wall thickness right. This is my third attempt...

SO... All I have to do now is add the detailing in styrene plastic to the transparent body and then mask the windows before painting. That's the next job. Fingers crossed! 😂
3. N Gauge Gas Station
Now that I've finished my first N Gauge building model - the railway station - I can crack on with the little gas station (it still niggles me to call it a 'gas station', it's too American) I was already well on with. Here's a re-cap of where I got to with it...
 |
| Above: Main building done... Tick! |
 |
| Above: Ah, yes... I was doing the base and the backyard! |
With the project dusted off - literally - I could see what I was doing and pick up from there. The main job is to complete the rear 'junk yard' behind the garage and store. Then I can move on to fitting the gas pump island and some cars.
As with the railways station, although I have made accommodation for lighting I am not adding any at this stage.
And Finally, Something Completely Different!
Something else I am working on, but not strictly on the workbench, is my latest acquisition of a STYLOPHONE BEAT box!
 |
| Above: First attempts trying out the BEAT and seeing what the controls do. Not - incidentally - the sound I'm after for my videos! LOL |
Post a Comment