
The wife had to do school work, so I had a day to myself!
How Many of My Projects Can I Fit Into One Day?
OK, surprise, surprise...Our Bank Holiday Monday - which we usually go out on a day trip together - became an opportunity for me to get some time in my man cave!
 |
| Above: Last night's view from my attic man cave. I really want to spend more time up there but I can't seem to get the spare time! |
The poor wife - who is a teacher - has had to slave away on a huge pile of marking and lesson preparation due to staff shortages. This has left me free to pretty much do what I want for the day. Nice.
So, starting early I tried to pack as many projects into the day that I could...
And We're Off! Honey, I Shrunk the Hi-Fi!
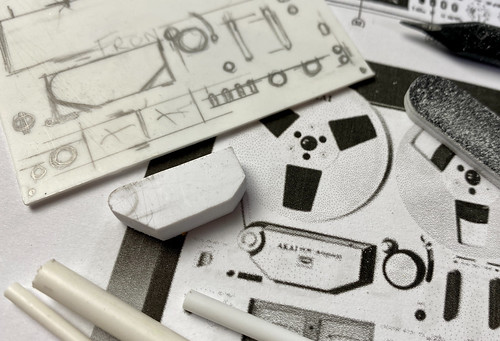
I began the day by cracking into my little 1/6th scale scratch building project, building a miniature version of a 1970s AKAI GX 4000D reel-to-reel tape deck. I've always wanted one of these, but as time went buy the real thing became rarer and more expensive and so it is increasingly unlikely that I'll ever be able to afford one. (Current eBay pricing is from £799 to well over a thousand. Eeek!) 😧
So, I decided it would be cool to try and build my own miniature model, inspired by the work of the HMS2 YouTube channel. Here's a peek at the amazing world of miniature 1/12 scale houses...
I've kinda fallen in love with building with plasticard (styrene) since I constructed my N Gauge railway station so this gave me the idea to try out something a little different. I have a - probably over-ambitious - plan to build a miniature 1970s themed bachelor pad, furnished with all the sorts of stuff I wanted at the time but couldn't have (like the AKAI tape deck).
SO I've been busy and got some decent amount of progress done today. Here's a snap of where I got to by lunchtime today...
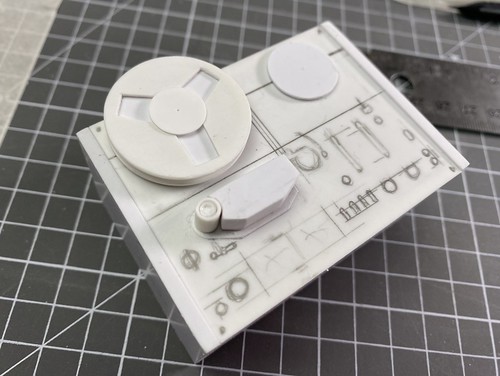
I'm videoing this project as I go along so at some point I'll upload a complete run-through of this project (soon-ish).
Goddamit! Er, I mean Gundam it!
After lunch, I finally bit the bullet and cracked open the Gunpla kit - a Bandai HG RX-78-2 Revive - that I've been too scared to start for the past two weeks. 😟
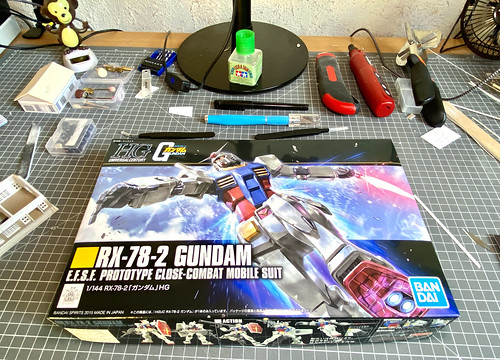
...It's just been sitting there - next to my workbench - taunting me! But this afternoon I gathered up my courage and cut open those plastic bags of components and clipped off the first of the parts, ready to build.
I'll be honest, it wasn't quite as easy as a conventional plastic kit for a couple of reasons.
First of all, Gunpla kits are designed to be to made OTT ('out the box') and are moulded in the appropriate colours. Now this sounds convenient - with no painting required - but this means you have to be very careful with your cutting of parts and construction as you won't be able to hide any mistakes under a layer of paint (as I used to do frequently with my military models). 😋
And secondly, the kits are also intended to just snap together - 'no glue required' - which, again, sounds good but at times can make things a little difficult. Trying to snap together several sub-components into a larger main component can sometimes be a bit tricky and I found myself thinking it would be easier if some of the parts were stuck together and so would just pop out at the most inconvenient moment!
Still, that's probably just me and my fumbly fingers!
I eventually did manage to get all the parts to behave and put together the torso of the mech suit! And, despite some choice words, was quite pleased with myself...
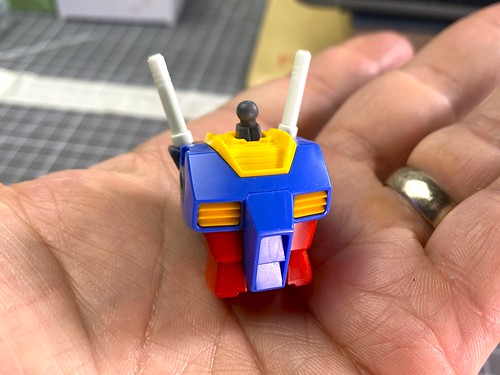
Phew! One tiny step of a small model of a giant mech suit...In miniature form...
Next, onto the head/helmet...Or whatever you call it.
And Now For Something Completely Different!
OK, now the later part of the afternoon had me a little stumped as I did some preparation from a completely new project in a subject area which I have NO clue about... Electrics.
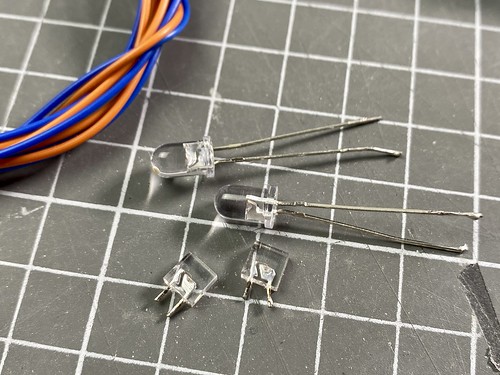
I have decided - idiot that I am - that now is the time of my life that I should learn how to wire and solder things together in order to make things light up! What I mean, is that I thought it would be nice if I could add some miniature LED lights to some of my model projects, particularly as I am now working on model railways.
So, I went to a local electrics store and the nice bloke behind the counter advised me on what I needed to make up a couple of little 'learning kits'. Simple basic components that would - with the help of some YouTube tutorials - wire together some simple lighting circuits.
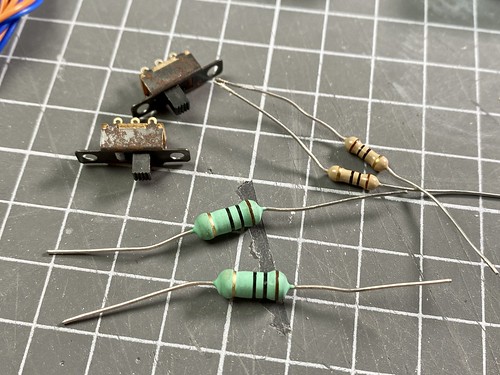
Luckily, my wife is not only a Science Teacher but also a experienced electrical engineer, so she has offered to guide me through the basics and hopefully I'll be able to put together and couple of simple battery operated LED units.
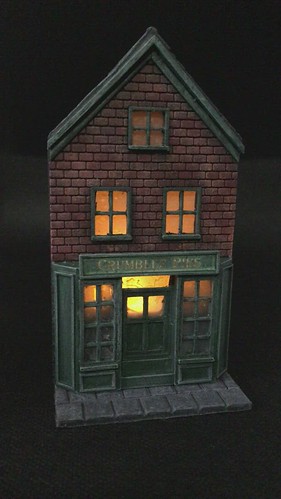
If I manage this I hope to be able to rectify the pretty dreadful job I did of lighting my 'Te Oldie Christmas Shoppe' model project I did a couple of years back. I did this using a cheap battery operated tea light candle, but it was never satisfactory as the flickering effect made the model look like the shop was on fire! 😖
And Finally, Time Ran Out...
Well, I squeezed in as much as I could but - as things do - time beat me. So, I was just able to get one last small job done before the wife finished her work and said she'd like to 'do something together'.... Bum. 😭
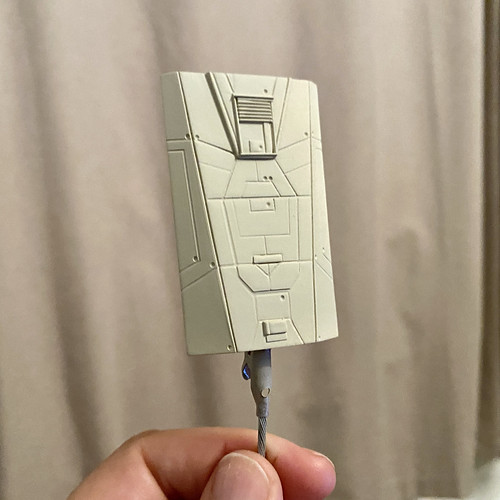
It's a further bit of detailing on the test piece I made to practice scribing and panel line effects. All primed and ready to try our some paint effects! This could be some armour, or a bit of a space ship - I enjoyed throwing this together!
Well, that's my surprise extra day to myself over... Though It ended with a smile as we caught a little visitor to our back yard... Just as well I wasn't baby sitting the do today! 😂
Post a Comment