

Not thinking ahead has come back to bite me in the ass!
An Tricky Afterthought...
Something of lack of forward thinking came to light as I near the completion of my N Gauge Gas Station building. The issue stems from my getting ahead of myself and making the model railway building BEFORE I had actually built the layout itself!
Normally, I guess, I would just place any building I make for the layout directly onto the baseboard, thus I would have a ready-make model base.
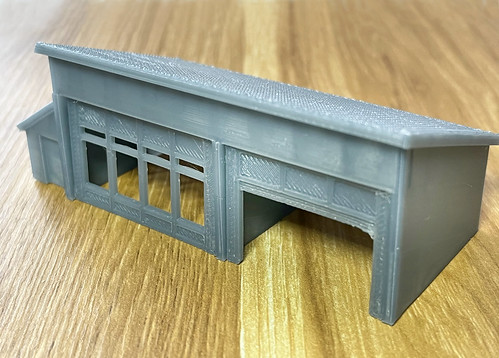 |
| Above: It seemed a good idea at the time. Make a gas station out of this model. I wish I'd taken a bit more time to think about the end product and how to base it! |
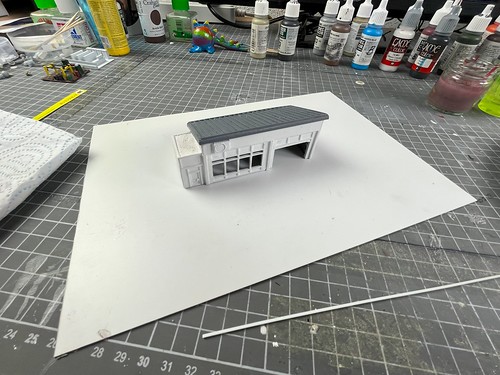
BUT...In my case, I am still playing about with temporary unbased layout setups on the kitchen table (on a big piece of green baize material). So, in the case of my first model - the little railway station - this wasn't a problem as the model was self-contained didn't need a base. Ideal.
My gas station, on the other hand, is a little more complicated. It has two distinct parts - the building and a forecourt - plus I decided it would look more realistic if it had additional bits and pieces around the building and give it a bit of a back yard... And so on! LOL
So, long story short, it will need a base of sorts to making it transportable until such time that I do have a layout to put it on.
SO...What to do?
Having made the mistake of not thinking about this BEFORE I started the model, I now have to do some sort of remedial fix. A temporary base of some kind.
 |
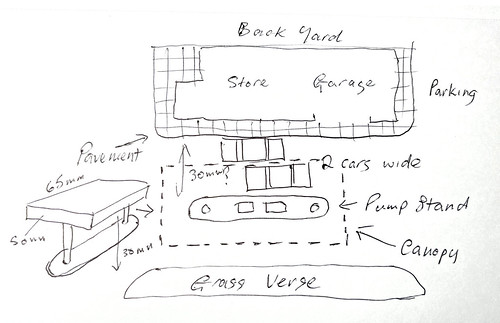
| Above: If only I had BEGAN with a little sketch design like this! Instead, I am having to cobble together a plan as an afterthought! |
What I am thinking of now is some sort of lightweight and thin base matt or board I can sit the model parts on for when I am using it in combination with my temporary dinning room table 'layout'. Something, that can either be removed again OR integrated into the final fixed layout board...Whenever that comes about!
So, after much head scratching I decided I needed something light enough and thing enough to look OK when placed on a table set-up BUT ridged enough to support the wee diorama additions I have in min for my garage. Likely materials might be...
- Thin plasticard (1 or 2mm thick)
- Floor tiling squares (lino) - got this idea from @Billmakingstuff
I ruled out carboard because it would be too floppy and susceptible to moisture warping. And foamboard is out as well as even the thinnest would be too thick and, again, it would be apt to being damaged too easily.
The floor tiles idea seemed a good one - they are light, flexible, easy to cut and cheap - but the one draw back was.... I can't find any locally! Certainly mot the uber cheap Poundland ones that @Billmakingstuff highlighted in one of his episodes. Bummer! So, Plan B...
I'm a bit reticent about using a whole sheet of plasticard just for basing. It seems a bit of a waste, after all sheets of styrene aren't cheap, and I'd rather use some recycled material. But on this occasion it seems like the best recourse just to move the project along, so hey ho.
Marking Out a Plan...
OK, so I do have a vague doodle of what I want to place on the base but even so I am still playing this very much by ear. One of the issues is that I don't know much about petrol station design, I mean I've seem them - obviously - but I don't know whether there is any strict conventions about placement and dimensions.
 |
| Above: The Gaugemaster / Kestrel Kits GMKD1003 Service Station Kit - N Scale. Similar to my idea, but this model will cot you a whopping £26!!! |
I had a quick look on line at other commercial N Gauge gas station models, but that didn't help as they come in all sorts of shapes and sizes... So, let's just bash something together and hope that it looks OK!
I did make some notes on dimensions AS I tried to assemble the parts, but it was all very ad hoc. My main concerns were; the width of the car lanes between the garage and the pump stand (one or two cars wide?) and the size of the pump stand canopy.
Again, I did some Googling to see if there were standard sizes for either of these, but practically every model I found online was a slightly different design with difference arrangements and dimensions for the various parts! 😖
So, let's just make up my own design! LOL
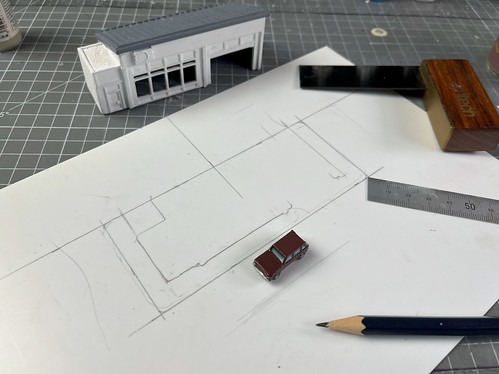
...Yeah, a bit shoddy, but I will, no doubt, correct dimensions as I go along. I'll use a couple of my model cars for reference.
Let's Build!
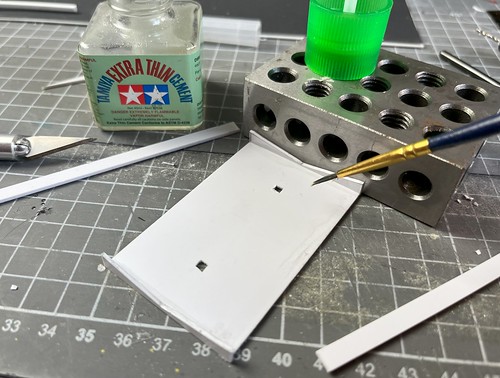
First things first, I wanted to make a pavement around my garage/store building. So I cut some 2mm plasticard into a rectangle and decided to have a go at making a paving slab design onto it by using my scribing tool...

I thought a 9mm margins - or width of pavement - around the building would look OK. And once I had this as the base dimension around my garage I could them move on to working out the width of the car lane between the garage and the pump stand island.
I decided to go wide, with a two car lane. My thinking was that this allowed a car to park at the store but still allow cars to drive past any parked cars to drive through or to the garage section. Am I over thinking this? (Who cares?) LOL
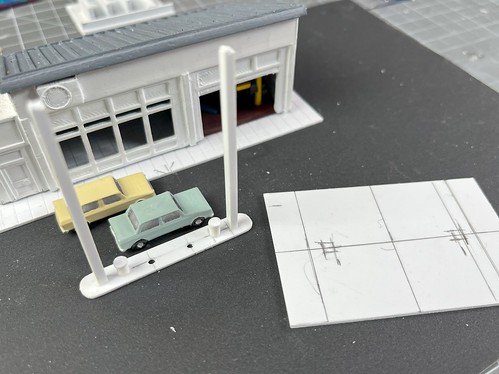
Incidentally, I put down a sheet of wet & dry paper onto the base plasticard to simulate asphalt. It kinda worked very nicely!
You can see I quickly put together a basic pump island, with the pylons to support the canopy and a couple of trash cans make out of bits of styrene rods. I did waver on whether to do two or four pumps, but stuck to my original idea that this was just a small rural gas station... So, two pumps.
This width - from the garage to the pump island - gave me a rough dimension for the size of the island canopy. Because I had already built my garage building I had to go with a separate canopy rather than one that adjoined the garage itself. I got started on cutting out the pieces for the canopy and gluing them together...
I wanted to include a 'V' shaped roof for the canopy and I wanted the canopy to be reasonably deep so I could ad advertising signage on it, so all the dimensions kinda just fell into place at this point.
My main issue was how tall to make the canopy? As tall as the garage, or a little shorter? So I played around for a while and also went back online to see what the 'norm' was.
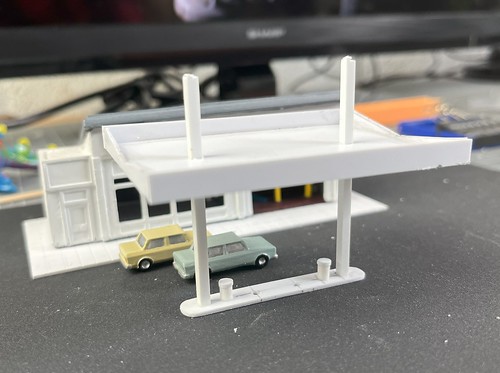
Despite this looking rather high to me, it actually was pretty standard according to the reference photos I found of real gas stations. So I pencilled in this hight on the pylons, trimmed them down and then glued the v-shaped roof on.
It's a might top heavy at this point, but as it will be glued onto the main base board that should be OK. I had already pre-drilled the locations for my two petrol pumps (which need finishing off) but we are looking good! 😀
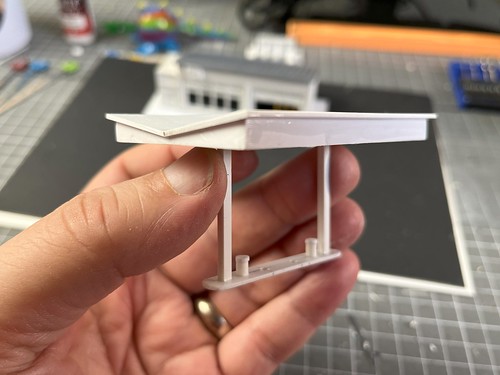
And that's that - the pump island constructed. I can start painting all these various parts before gluing them down onto the main base but I'm pretty happy with the way things are going seeing as this has all been sorta randomly put together.
Bit of a moral for the next model I make for my layout - do your planning FIRST! 😂
Anyway, that's this part of the modelling done, next I'll start the painting and weathering and adding all the signage. I really enjoyed this little build as I had forgotten how much I enjoyed working with plasticard, it was a nice change from the mostly 3D printed construction of the garage building itself.
Now, let's try not to mess up with the paints!
Post a Comment