
When simple ideas become less and less simple!
A Funny Thing Happened on the Way to the Forecourt!

 |
| Above: Quite please with myself, I'm getting better at neat scribing! |

 x
xA Funny Thing Happened...
While this whole project has been a bit of a planning fiasco it kinda all came right in the end really.
Who would have thought that by adding this diorama base that I would rectify one of my main oversights, that of how I would access the finished model to add lighting.
 |
| Above: My original garage building floor 'plan'. These small separate sections would be glued in once paintied... BUT then, how would I add lighting? |
In my original stand alone gas station building model I had made some very dodgy means of accessing the building in order to wire up some LED lighting. I had left a (very) small hole in the store side entrance where I hoped I could wangle the wiring through to the main building... Even when I did this I sorta knew that I was fooling myself that this was in any way an ideal solution.
 |
| Above: My original - ill-conceived - idea for being able to add a LED wiring was to (somehow) thread any wires through the bottom via a tiny hole in the store! 😖 |
Once again, that I had not planned the design to include this from the outset was just storing up a lot of problems for later.
Anyway...
In subsequently deciding to add a diorama base to the model it co-incident gave me the opportunity to do something about this. I realised that, instead of gluing in the small floor sections of the store and the garage halves - as I had initially intended - that I could construct a kind of 'trap door' bottom to the whole diorama base as a means to accessing the garage building for subsequent wiring!
I just cut the appropriate shapes out of the pavement section and through the base board giving me a means to install (and remove again) the mini floor squares. Simples! 😏
So, all's well that ends well... It was all planned really (I joke)!
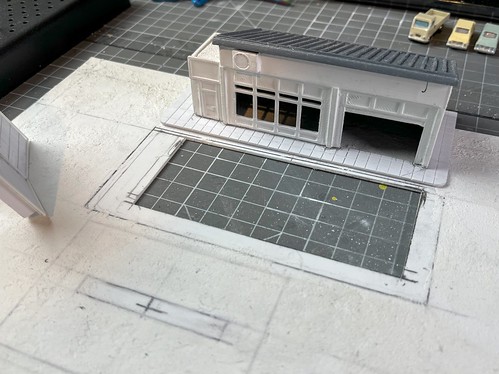
 |
| Above: A view of the garage building additions showing how the original small floor squares could now be slipped in (and out) from underneath. |
Well, that's that for the moment. What I have in mind next is to add the windows to the convenience store and then I can glue the building to the pavement rectangle. After that I want to start fencing off the back yard and adding a forecourt wall to separate the station from the ain road.
I also had the idea that I'd like a little storage shed in the back yard and I'm designing one but I'll cover than in it's own seperate post. That's where we will continue the saga of my gas station build!
Post a Comment